How to Inspect Your Evaporator Coil Through the Access Panel
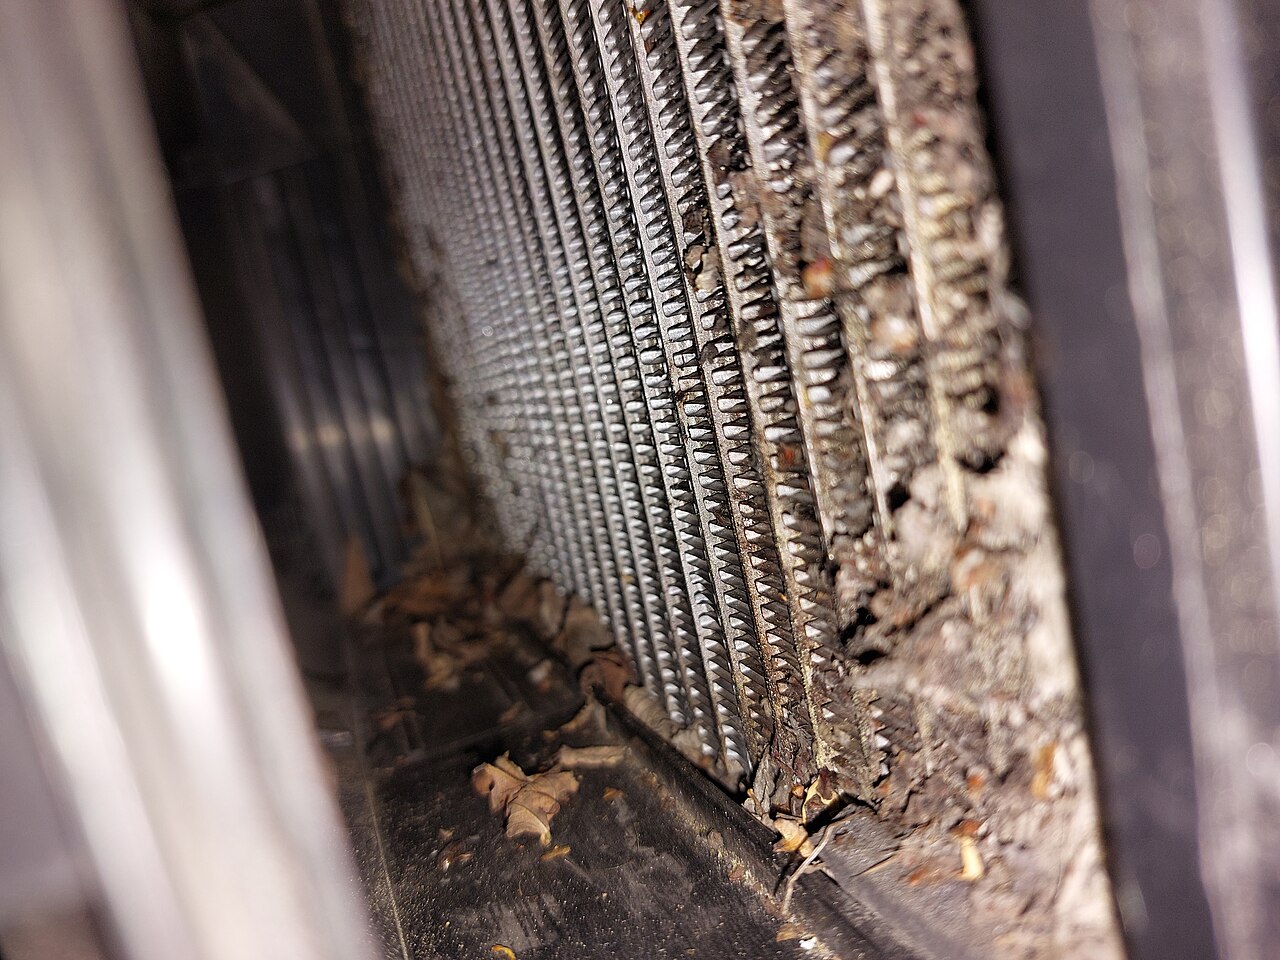 The humidity hit 88 percent by 9 a.m. last Tuesday near Aventura Mall, and the AC had been running nonstop since Sunday. You're standing in the hallway closet where the air handler lives, flashlight in hand, because the vents are blowing warm-ish air and there's a faint musty smell every time the blower kicks on. The access panel screws are painted over from the last guy who was here, but you've got a putty knife and patience. This is the moment where a five-minute look saves you a four-figure repair bill.
Where is the evaporator coil access panel on my air handler?
The evaporator coil sits inside the air handler — the big metal box usually in a hallway closet, garage, or attic. On most residential units in South Florida, the coil compartment has a dedicated access panel on the side or front, separate from the blower panel. It's typically secured with four to six sheet-metal screws, sometimes painted over. If you see two panels stacked vertically, the top one is usually the coil side. The suction line (the larger copper pipe with black insulation) enters the cabinet right at that panel — that's your landmark.What tools do I need before I start?
You need a flashlight (phone light works but a dedicated one leaves your hands free), a 1/4-inch nut driver or Phillips screwdriver for the panel screws, a putty knife to break paint seals, and nitrile gloves. A small inspection mirror on a telescoping handle helps you see the back side of the coil without contorting. Skip the coil cleaner sprays for now — this is a look-only trip. If you find heavy buildup, that's a separate job with specific cleaners and rinse procedures.How do I safely open the panel without damaging anything?
Kill power at the breaker labeled "air handler" or "AHU" — not just the thermostat. Verify it's dead by trying to turn the fan on at the thermostat; nothing should move. Run the putty knife around the panel edges to break any paint or caulk bond. Back the screws out slowly and set them in a magnetic tray or your pocket. The panel may stick; wiggle it gently. Watch for the drain pan lip — the panel often slides under it. Don't force it. If it fights you, check for a missed screw or a clip.What does a healthy evaporator coil look like?
Shine the light across the fins at a low angle, almost parallel. You want to see clean aluminum — bright, metallic, with even gaps between each fin. The copper tubes running through should be visible as thin lines. No dust blanket, no gray fuzz, no greenish corrosion spots. The drain pan underneath should be dry or have only clear water sitting in it. If you see rust flakes in the pan, the coil may be weeping refrigerant oil — that's a call-us moment.What are the red flags I'm looking for?
Dust matting: looks like gray felt pressed between fins. It acts like insulation, stopping heat transfer. Frost or ice: any white crust means airflow is choked or refrigerant is low — both need a pro. Oily residue: a rainbow sheen or dark streaks on fins or in the drain pan signals a refrigerant leak. Bent fins: large sections smashed flat from a filter that collapsed or someone shoving something in there. Mold-like growth: dark splotches on the fin edges or pan — this is where we do HVAC deep cleaning with preventative anti-microbial treatment, not bleach. The video below shows hands-on work on an indoor evaporator coil with easy access — the same kind of coil and cabinet layout this guide walks you through inspecting.The video demonstrates an evaporator coil being cleaned on an accessible indoor unit — opening the cabinet, getting to the coil, and working on it up close. Watching the coil at close range gives you a feel for what the fins and copper tubes look like in real life, which makes your own flashlight inspection easier: you'll know clean metal from dust matting when you see it. Key takeaway: look at the coil the way the video does, close and at an angle, before you decide it's clean.
Can I clean the coil myself if it's dirty?
Light dust on the entering-air face — the side the filter protects — can sometimes be brushed gently with a soft coil brush (nylon bristles, not wire) and vacuumed with a shop vac on low suction. But the leaving-air side, the back rows, and any oil or mold means the coil needs professional cleaning with foaming cleaner, proper dwell time, and a condensate-safe rinse. Spraying household cleaners or pressure washing bends fins and pushes crud deeper. We've seen DIY attempts turn a $180 cleaning into a $1,200 coil replacement.Why does a dirty coil make my AC run longer?
Think of the coil like a radiator. Air passes through the fins, gives up heat to the refrigerant inside the tubes. When dust fills the gaps, air takes the path of least resistance — it goes around the coil through any gap, or just moves slower. The refrigerant doesn't absorb enough heat, so the compressor runs longer to satisfy the thermostat. Longer run times mean higher electric bills and more wear on the compressor. In Aventura's summer, that's an extra 300 to 500 kilowatt-hours a month on a 3-ton system.How often should I check the coil through the access panel?
Once a year, right before cooling season ramps up — March or April in South Florida. If you have pets, run the fan continuously, or live near construction (looking at you, Williams Island corridor), check twice a year. The filter catches most big stuff, but fine dust, pollen, and salt air slip through and plate out on the wet coil. A quick look takes five minutes. Catching a refrigerant-oil stain early can save the whole system.When to call us
DIY is great, but some jobs need a pro. If the problem persists, you spot anything dangerous, or you'd rather have an expert handle it, call (786) 664-2155 — Aventura HVAC Maintenance serves Aventura and nearby (Mon-Sat 8AM-8PM). No pressure, no upsells.
Need a professional touch?
Straightforward HVAC service with flat, honest pricing — quoted before any work begins.
No review discounts · no upsells.